Thursday 15 December 2011

Workshop in the depths of winter...


Today is the winter solstice and that marks the time when I start to wind down in the workshop, for a few days at least. I can never resist sneaking off into the workshop for long though. I am going to regrind many of my edge tools, put some new shelving under the work benches, make some bridges and get 2 guitars set up and strung. Oh, and polishing of course...

And so, I wish you seasons greetings, and thank you all for your interest and support over the past year, and leave you with this link to a Christmas song, sung by Kate Rusby. She plays a guitar made by the fine English guitar maker, Peter Barton, one of those rare makers who has gained respect as a builder of both classical and steel string guitars.

Louis Panormo copy, polished and strung


I recently finished this Panormo copy, the full story of which can be found here. I'm delighted with this guitar, both in terms of its sound and playability. It is a fairly accurate copy, if copy is the most appropriate term. Perhaps replica or facsimile are better, or just 'guitar in the style of...'? There are some differences from the original, such as the choice of Indian rosewood for the back and ribs, and the back is solid rather than rosewood veneered onto pine, although some Panormos featured this style of construction.


Although not usually required by modern players, the turned bone or ivory strap buttons are an unusual and distinctive feature of Panormo guitars. The 2 small buttons mounted on the back were intended to have an old guitar string strung between them, which could then be rested on a belt buckle or something similar, thus supporting the guitar. The large end button would have held one end of a strap; the other end being tied to the headstock.


Many 19th century guitars feature pin bridges, where the string is held in place by small wooden pins, rather than being tied as they are on a contemporary guitar. It is these differences that make this type of guitar so much fun to make, as they represent a subtle change from the guitars I normally build. A Panormo bridge is really rather more complex than a modern bridge, and is very distinctive and unique.


The top model produced by the Panormo workshop featured mother of pearl embellishments in the rosette but I opted to go for the all wood version. The picture above shows the guitar strung, but the label is not yet installed.

The picture below shows the end button, which is much larger than anything you would see on a modern instrument. Many years ago I acquired some old and broken chess pieces, and I have fabricated this button out of one such piece. It really does look the part.


This instrument is currently for sale. Please contact me for more details.

(Sold December 2011)

Wednesday 14 December 2011

In (and out) of the workshop...


Earlier this week I burnished up Julio's guitar and today I will be fitting Alesi tuners, a nut and saddle and then stringing it for the first time. The shellac finish is looking highly polished and I couldn't resist taking this picture. My tools reflect rather nicely as does the lamp and the workshop clock!

I recently paid a visit to David Dyke over in East Sussex. David has been one of the leading musical instrument maker suppliers for many years now, and many makers who have visited his place in Horam will recognise the scene below.

On this visit I was accompanied by Mike Francis who made a guitar with me a few years ago. Mike has recently returned from a year learning guitar making at Newark College, and had all sorts of tales to tell of his guitar making adventures there...


This is David's packing bench. Note the high-tech scales and the rolls of different gauges of fret wire hanging from the ceiling. I was paying a fleeting visit and only needed a few small items, but the next time I visit I will take more pictures as there are always exciting things to see.


The picture above shows a bridge being glued on to a rosewood and spruce guitar that has a story to it. A few months ago I was commissioned to complete this unfinished instrument, the maker having died some time earlier. His friend, who had been left the guitar, wished to have it completed in memory of the maker. I had made an initial assessment of the guitar, but it was only when I was looking at it the following morning that I realised that there was a signature on the endblock and that the guitar maker was Richard Slack. Although I did not know him well, we had met on various occasions over the past 20 years at local guitar events. Richard turned his hand to making many different types of musical instruments (I remember admiring a fine hurdy gurdy he had made) but I think he was best known for his classical guitars. I had seen him last about 5 years ago when I visited his workshop in Worthing.

Completing this guitar has been a thought provoking process and I have taken as much care as I can with this guitar. That Richard will never hear this guitar is a sad thought indeed but I am sure many of us will leave things unfinished or unresolved. I strung it for the first time earlier this week and to my great delight it sounded lovely; no one could be more pleased than me.

Saturday 26 November 2011

Adam's guitar-headstock


I am posting a number of pictures of this guitar, as Adam is unable to visit the workshop and see progress for himself.

I very much enjoy making necks. When all is said and done, a guitar neck is a fairly straightforward bit of carpentry so I can relax and just enjoy working the timber and using the tools. The headstock design is not my own. I first saw it on a guitar by the late Martin Fleeson, and the most famous exponent of the design is the great French maker Daniel Friederich. Last year I was chatting with the German guitar maker Andreas Kirschner and we noted that we both used this design. 'Why not?' laughed Andreas, 'it's the best there is!'
The head facing is some bookmatched cocobolo that I cut recently from some off cuts of large boards that I acquired, many years ago, from Bob Smith at Timberline in Kent. I have about 15 sets of back and ribs of this stuff and all of it is quarter sawn like this head facing. This picture also shows the cedar neck; the black strip in the centre is a carbon fibre rod that I use to add a little extra strength to the neck. The wood for the neck itself is stunning, perfect in fact. The flecks that you can see running across the neck are medullary ray figure and show just how well quartered this neck is.


Here are the string ramps being carved. I love the simple sculptural process of making these ramps. Although they are essentially practical (to provide clearance for the strings as they run down from the nut to the machine heads) they provide an elegance and grace to the finished head. I always enjoy carving through the head facing and revelling the lamination of veneers.

Adam's guitar-bindings


Here are a few pictures of the guitar I am making for Adam when it was being bound. I have chosen flamed koa for the bindings; I love the rich colour against the dark Indian rosewood and the rippled figure in the wood is a delight. The humble clothes peg makes a wonderful clamp as the above picture shows. This is a rather laborious way of making up bindings but the finished effect is well worth it.


I know I have shown a similar picture to this before but I couldn't resist adding another one. I much prefer using cloth tape to hold the binding in place whilst gluing as I can apply a lot of all round pressure using this method. Visitors to the workshop who witness this process are most intrigued by the sight of a trussed up guitar. I remember one rather shocked visitor voicing concerns that she had stumbled on some bizarre ceremonial guitar making ritual. It took some time to convince her that it was an everyday guitar making practice.


And finally, the finished purfling and binding. The koa will come alive under the polish and provide an elegant but understated edge to the guitar. Koa is a beautiful timber from Hawaii and has been used for ukuleles and steel string guitars for many years. When I started making guitars it was very rare to see it in the UK, but the internet has made this special timber readily available to makers. I love it and feel privileged to use it in my guitars.

Tuesday 8 November 2011

In the workshop-Adams guitar


I have been meaning to post these pictures for some time now, but working out how to use the new camera and keeping up with tasks in the workshop has prevented me from doing so. These pictures are of Adam's guitar, which has a Western red cedar soundboard and Indian rosewood back and ribs. These pictures were taken some time ago; the guitar will be ready for polishing by the end of this week. The rosette is a simple but elegant one. It harks back to Torres, but its strong simplicity has a very contemporary feel to it. I make my rosettes in a jig and then inlay them whole into the soundboard. The cut you can see in the rosette allows for easier fitting and is completely hidden under the fingerboard once the instrument is complete.


Here is a picture of the finished soundboard and the back behind it. I still use a fairly traditional strutting pattern and many familiar elements can be seen in my strutting. One of my main interests at the moment is adjusting the positioning of the 3 lower bout cross bars in relation to the soundboard qualities. The positioning of the bar directly beneath the bridge is particularly crucial. I am conducting experiments on my test bed guitar to nail this down more precisely. I have been using this pattern for about 5 years and it gives me the beauty of sound that I love, with a power and dynamic range which many contemporary players require.


Here is a rare action shot! I do not use a full form to build the guitar, which I find cumbersome to use. I have a base board with a small number of locating dowels that hold the ribs in place whilst the end blocks are glued in. In this picture I am cutting the notches in the linings into which the back bars will fit. Those of you who know me well will gasp the at appearance of glasses. Years of close work have caught up with me so I now have this new bit of crucial workshop equipment.


This picture shows the linings and end block. It also shows the laminated rib construction that I use on most of my guitars. The end block is given a few coats of shellac for no other reason than I like the look of it through the soundhole. With the notches cut I am now ready to finally fit and glue the back, before moving on to the top linings and soundboard fitting.

Thursday 3 November 2011

Walnut guitars


A couple of guitars have recently been finished in the workshop that have used walnut for the back and sides. Neither have been made by me; they are the work of Lawrence (above) and Frank. Lawrence has recently relocated to Australia and we finished his guitar with a week or two to spare before he left. The guitar worked out beautifully; spruce, black walnut and a maple neck, with an elegant African blackwood soundhole inlay. I do hope this has survived the journey out to Australia.

Frank's guitar has a rather more complicated story. Having already completed a fabulous Macassar ebony 6 string, Frank decided to build on that success by following up with a 12 string using maple and walnut for the back and ribs. I can't quite remember all the twists and turns of this project, but it started as a large bodied 12 string, and ended up as a very fine 6 string tenor guitar. Just the middle courses are doubled.


This picture shows Frank's fine workmanship and the elegant rosewood bridge. Below is the instrument about five minutes after being strung up for the very first time. This is always an exciting moment for any maker, marking the culmination of many hours of work. Frank had come straight from work, hence the smart shirt!


Thursday 13 October 2011

Louis Panormo copy


Rebuilding this copy of a Panormo guitar is a project that I have been working on for the past year, when I have had an occasional bit of spare time in the workshop. It is something that I have been meaning to do for years but it has always got pushed to the bottom of the list.
I originally built this guitar in 1991 as a way of learning more about the guitars of Louis Panormo, and to extend my repertoire as a guitar maker. Having completed the guitar and proudly strung it up for the first time, I quickly lent it to a player for some concerts. Sadly, he almost immediately dropped it and it was returned to me with the soundboard irreparably damaged. Having put all that work into building the guitar only to see it smashed ensured that I didn't have the heart to repair it, and so I put it in a corner and forgot about it. There have been several occasions since then when I have been close to throwing it away, but have never quite managed to do so. I am pleased to say that it close to being strung up again.


Had this been an original Panormo I would have repaired the soundboard, but with this modern replica it was preferable to replace the soundboard. I hadn't been happy with the original soundhole embellishment so this gave me the chance to produce something a bit better. The picture above shows the new soundboard just before I glued it to the body of the instrument.


I'm pleased to say that this 'new' guitar is a considerable improvement on the original instrument I made and I am very much looking forward to stringing it up again. The polishing is complete and the bridge is glued on; I am just waiting for tuners.

I haven't found a new owner for this guitar yet but I hope that this time it will be looked after properly.

(This guitar has now been sold)

Friday 30 September 2011

friday evening


My main computer comes back tomorrow (the power on button failed - reassuringly low tech stuff) and I will be able to plug the new camera into it. I have been without a camera for a couple of months since I dropped my old one on a hard chalk and flint path on the South Downs.

This is the end of an auspicious week, where the blog achieved more monthly page views than ever before. I have very much enjoyed writing about my workshop and all that goes on in it, and have been thrilled with the interest that has been shown by people from all over the world. It seems to have provided inspiration for some, valuable information for others and an insight into another world for many. Thank you for taking the time to read it.

The picture at the top of this post is an old one and shows linings being glued in.

Thursday 8 September 2011

Birds-eye-maple guitar


I have recently sent this guitar to Guitar Salon International in Santa Monica and I thought I should post some pictures of it as it is a striking guitar. GSI are one of the leading classical guitar dealers and have rightly established a fine reputation for their knowledge and professionalism. I have been dealing with GSI for many years now (I think since 1998) and it is always a pleasure to work with them. Tim Miklaucic established GSI in the mid 80's and has always had a sumptuous stock of magnificent guitars, both new and vintage. I think it is very telling that GSI's style and ethos has been emulated by others, and their website has set the standard for others to follow. All guitar enthusiasts should take a look at their site which has a huge amount of fabulous pictures, information and recordings.


This particular guitar is my traditional model, and whilst it is not a slavish copy of any particular instrument, it does draw on a couple of Torres guitars that I have worked on (I must write something about those), the 1941 Hauser which I have written about, and the guitars of Simplicio. GSI have been so kind as to describe this guitar as 'an exceptional guitar by all standards' which I am very flattered by.


Friday 19 August 2011

Yew

A few days ago I had a break from the workshop and spent some time walking through Kingley Vale, the largest ancient yew forest in southern Europe . Amongst the trees there is a grove of majestic, twisted yews that are believed to be around 2000 years old. English yew is a remarkable tree and has become immersed in English folklore.

The wood of the yew is most commonly used for the traditional longbow and I have promised myself that one day I will make one. It is not widely used in guitar making, although I regard it as an English 'exotic' timber that can rival some rosewoods in appearance. It is, of course, a softwood but with an even and smooth texture. Often it shows wild graining and it is difficult getting clear timber big enough for guitar backs and ribs. I use it for small details such as purfling and binding, or for headstock facings, such as the one above.

Sunday 31 July 2011

Making guitar parts

Last week I spent some time producing a number of components for future guitars. Normally I make in batches of 2 instruments at a time, although at the moment I am making 1 guitar and finishing off various long term projects at the same time. The picture above shows sets of ribs for future orders; the nearest ones, that look a bit blotchy at the moment, are satinwood. Most of the time these days I bend ribs in my side bender rather than on the traditional bending iron. It is quicker, more reliable on highly figured woods and releases me to work on more important parts of the guitar. I can bend ribs quickly by hand (I should be able to - I've bent enough of them!) but the bending machine takes a few minutes of of my time, and then I work on something else until it has cooled down. In the winter it helps to heat the workshop as well!
The bending machine I use is found in many guitar makers workshops these days. Designed by American guitar maker Charles Fox, it uses light bulbs as its' heat source and really is a tremendous bit of equipment.


I have also been busy preparing a bundle of fingerboards for future use. I have featured my table saw on a recent post, but I enjoy using it so much I thought I would mention it again. I have just cut the fret slots in 6 fingerboards and each board took about 3 minutes. It really saves time doing it this way and is very accurate.

I have listened to heated debates amongst makers concerning the use of machines verses traditional hand tools. There is a school of thought that believes a guitar will be better if made entirely by hand, and that any use of machinery will impair the quality of the final instrument. This is not a belief I share. Much as I love and respect fine hand tools and their usage, I am very happy to make use of machines and new manufacturing innovation and technology.

Friday 22 July 2011

Herman Hauser


Hauser has a special place for me as the first great guitar I held, played and examined was a guitar that Hauser made in 1935. Once, as a young student in London, I was chatting to Colin Cooper, then the editor of Classical Guitar magazine. He mentioned that Victoria Kingsley had a Hauser, and a Bouchet. I duly wrote to her, asking if I could see the guitars, to which she kindly agreed. I visited her in Hampstead one dark winters evening and she very trustingly left me alone with her instruments for as long as I wished. She also provided me with a cup of delicious Earl Grey tea, served in a delicate china cup. Sadly the light was bad, and my photographic equipment primitive. The picture above is the only one I have. I took notes and measurement, expecting a great secret to be revealed: I am still waiting for that revelation.
Below is a picture of a page of the notebook into which I made notes and measurements, and the note from Victoria Kingsley. They are resting on the template I made of this guitar, and that I still have and use in the workshop.
I regret that the guitar was strung with the oldest strings imaginable, but what I regret more is not talking more to Miss Kingsley who had led the most remarkable life, which was eventually to run to 100 years. I will always be grateful to her for her generosity and trust in allowing me to learn from this beautiful guitar.


Hauser is one of those names that in guitar making circles has gained almost mythical status. Undoubtedly one of the most copied makers of the 20th century, his guitars have been used by hugely influential players, of which Andres Segovia and Julian Bream are the most notable. The prices that his guitars fetch are massive, and many are bought by collectors rather than players.


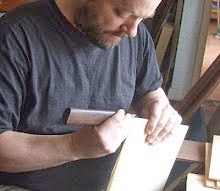
I have recently been going through my archive of papers and photographs and taking the opportunity of throwing quite a lot of material out. The pictures in particular have provoked quite a few trains of thought; none more so than these pictures of a Herman Hauser guitar that I worked on 4 or 5 years ago. Built in 1941, this guitar is pretty representative of Hauser's output and includes his characteristic rosette, headstock and inlay. Whilst it was in the workshop I took the opportunity to take detailed measurements and from these produced a full size working drawing. There were no surprises with this guitar, and anyone who is familiar with drawings of Hauser guitars by Richard Brune and Jeff Elliot will immediately recognise the details on my drawing.

.
The 1941 guitar was a pleasure to have in the workshop. The back and ribs were Indian rosewood, a timber that I have seen on a number of Hauser's instruments. The neck was mahogany with a tight, precise V-join. The top was of good quality but had a number of previously repaired cracks. It was thicknessed to 2.5 mm, thinning to 2.2 around the periphery. It should be noted that the instrument had been refinished, although I felt that the top had not been substantially altered. And how did it sound? Well-balanced, refined, not loud (nor quiet), a deep bass register that had not become flabby...to be honest I suspect it was past its best, but it is still a fine guitar. A hugely important piece of classical guitar history but no longer a concert guitar in my opinion.


2 years ago I was walking through Central Park in New York, wondering whether I had time to fit in a visit to the Metropolitan Museum of Art that was close by. They hold a fabulous collection of guitars, including Segovia's '37 Hauser, which he described as 'the greatest guitar of our epoch'.

The more I thought about it, the more cross I became with that statement and began to see it as rather destructive. I suspect Segovia was saying more about his own involvement with this guitar than anything else but it set the seeds of a grand distortion.


I, like many others, have been brought under the indefinable spell of Hauser, and have certainly played and heard some beautiful guitars that he made. He understood the materials he was working with, and he understood the nature of the instrument he was making. However, Hauser's qualities remain elusive and one wonders sometimes how his, or any maker's status for that matter, should really be evaluated.


Sunday 17 July 2011


Sunday evening and I am planning out the week ahead in the workshop. The main task tomorrow will be to grain fill Julio's guitar. These are some of the last pictures I will post of it until it is polished and strung up. It is one of those guitars that I am really looking forward to polishing as the woods I selected for it are subtly striking. The picture above shows the guitar being fretted: I use a metal headed hammer and and a soft-faced hammer. The metal hammer for the first tap in and the soft hammer for the final seating blow. Fretting always makes me thing of my old teacher Herbert Schwarz, who, when showing students how to install frets, would almost invariably end up with a flourish of hammer blows -'da dadalada da, bang, bang'! He would them glance around the workshop with a wry smile to see if anyone had noticed. I still do it now and again, even when I am alone in the workshop. I like to think that Herbert notices and smiles, wherever he is.

The metal pincers, used for nipping off the fret ends, were bought when I was a fresh faced student in 1984. Made in China, the were bought from a little hardware shop on Lower Marsh, just behind Waterloo Station in London. They're cheap rubbish really, but they work and are never far from my workbench.


Here is a picture of the fret slots being cut in the ebony fingerboard. The motor is taken from a very cheap table saw (the table and the blade being virtually useless) and a bespoke MDF table build around it. The sliding carriage is the simplest possible but is spot-on accurate. The time saved by using this saw, rather than doing it by hand, is so considerable that I wouldn't want to return to doing it with my specially set Roberts and Lee hand saw, however much I love that particular tool.


And finally, here is the heel cap being glued on Julio's guitar. The Cocobolo bindings look rather fine here; cocobolo is one of my favourite woods for bindings although I am getting a bit low on stock. In the background you can see a fingerboard being glued to another guitar. I use a polyurethane glue for fingerboards and you can see all the squeeze-out foaming around the neck and fingerboard.

Wednesday 13 July 2011

Test guitar

I have had this guitar kicking around for about a year now, but I only got around to stringing it for the first time last week. The idea of building a test bed guitar has appealed for a long time and I really am looking forward to working with this. The top can be changed in about 15 minutes and the list of things I want to test is growing and growing. For a month or so however I am just going to play around and get a few strange ideas out of my system! Ultimately , a disciplined approach is required to get the most from this. I'll post more on this later...

It has already been a full week. On Monday John Beckett from Northern Ireland visited the workshop with one of his guitars. John and I have been talking on the phone and via email for about ten years now but this was the first time we had actually met. It is always nice to talk about guitars and to see other makers work. The guitar John had with him was spruce and Indian rosewood, and conventional in design and build. It had a fine,balanced sound with plenty of volume and sustain.

For the rest of this week I shall be preparing two guitars for polishing. It always astonishes me how long it takes to clean up guitars and the grain filling process is one that really can be quite laborious. I strap on my dust mask, put some music on the CD player and just get on with it. (This week the workshop playlist will alternate between Julian Bream and the Foo Fighters!)

Thursday 7 July 2011

trussed and bound

At the beginning of this week I completed the binding on the two guitars that I am building at the moment, including this guitar for Julio. Both these guitars have cocobolo bindings, which is one of my favorite woods for this job. I know I've posted pictures of this operation before but it always makes for a good photograph.
Going back even further are these shots of the back inlay going in. Although I used to make the channel with a scraping chisel, I now prefer to use a router to make this cut. I don't have any problems with using routers (or bandsaws, piller drills etc) to build my instruments. There is a school of thought that says that a hand made guitar should be made using traditional hand tools only, but this is a not a view to which I subscribe.There are guitar making tasks that are made genuinely more efficient by using machinery, and the time saved can be more usefully spent on operations where the precise touch of the makers hand is needed.
This is a picture of the back strip fitted but not glued as yet. You can also see the rather stunning rosewood, which has some lovely colours and a nice tight grain. It is very well quartered too. as can be seen by the medullary ray figure.

Saturday 25 June 2011

Old School Guitars launch

Recently I attended the launch of Old School Guitars in Eastbourne. This is the new venture of David Crozier, a man who has established a great reputation in the UK and beyond for his knowledge of fine guitars. He has now started this new venture and very good it looks too. David has a passion for all things guitar; he has a fine guitar collection of his own and plays in several local bands. Over the past few years he has added guitar making and repair to this, and has just started building his third instrument in my workshop. David also has a passion for treating his customers with great care and respect - surely the way business should be done.


Tucked away in the old part of Eastbourne, the inside of this mews building, the home of Old School Guitars, is full of examples of the very best steel string and electric guitars. My eye was caught by an Eggle Saluda 'Book of Kells'. Someone else was attracted to it as well as it was sold before I arrived home! The picture above sums it up; David (in the white shirt) enthusing over a Patrick James Eggle guitar, and lots of happy guitar players!

The picture below shows part of David's in-shop work bench. I must have a word with him about this as it really is far too neatly laid out, unlike my own chaotic workbench. Old School Guitars is a delight to see and I wish it every success.

www.oldschoolguitars.co.uk

4

Monday 20 June 2011

Martin 0-15 - Neck reset


Last night I glued backs on the 2 guitars I am currently building, and today I have been preparing them for binding. The workshop sound system has been pumping out Bob Dylan (and the Carter Family) I don't always listen to classical guitar music you know. It seems appropriate therefore to feature this Martin O-15 which I recently worked on, although I'm not sure that the big Zim ever played one.
This guitar was made in the 50's and was one of the plainest, simplest guitars that Martin ever made. Top, back and ribs of mahogany, no bindings and the simplest of inlays meant that this was an affordable but quality instrument. Like a fair number of old Martins, this was in need of a neck reset, plus a few other small repairs.
The first part of the neck reset process is to loosen the fingerboard where it is attached to the body. I heat the fingerboard( having removed the frets) and then get in under the fingerboard with a hot palette knife. Once the fingerboard has started to separate, I carefully drive a couple of soft spruce wedges underneath and apply a little water and more heat. This can sometimes be the most taxing part of a neck reset, although this one separated without any great bother.
Just for the record, here is a picture of the inside of the guitar which shows the tidy workmanship inside the guitar.
Here is the neck being removed. A 2mm hole is drilled through the 15th fret into the back of the dovetail joint. This allows steam to be driven into the join and so soften the glue. The steam is generated by a domestic coffee maker; the jig and the rubber hose and nozzle are from StewMac. Once the steam has softened the glue, the jig, which puts pressure on the underside of the heel, pushes the neck out of the end block and the neck is removed.
The joint is now cleaned and the shoulders of the heel adjusted to achieve the correct angle on the neck. Because of this adjustment, the joint invariably needs packing with slips of veneer although i have seen a fair few Martins that were factory fitted with shims of card and paper.
1 plastic dot was missing from the 5th fret position so I made another one to fit. It is amazing how long it takes to make a small detail like this, but the end result is worth it. I also patched in some very bad fretboard wear. Some repairers simply fill the hole with epoxy, but I like to let in a perfectly matched piece of rosewood. The picture below is somewhat blurred, but you get the idea.
And here is a shot of the guitar in its finished state, restrung and ready for the next 50 years of music making.