Sunday 16 December 2012

Ries copy completed


Just before Christmas I finally completed this copy of a terz guitar by Nikolaus Georg Ries. This had been a long standing project and more can be read about it here and here. I had built this guitar for my own pleasure and education, but once strung it remained in my workshop for less than a day before being enthusiastically purchased. I had a lot of fun building the guitar and learnt much from it. I was lucky to have the original in the workshop throughout and so was able to make a very accurate copy. The picture above shows the original in the process of being restored, my copy, and a full sized modern classical guitar for scale. This small guitar is tuned a third higher than a standard guitar, has a scale length of 574 mm, and has a bright, lively sound. For such a small guitar it has surprising volume and is great fun to play.


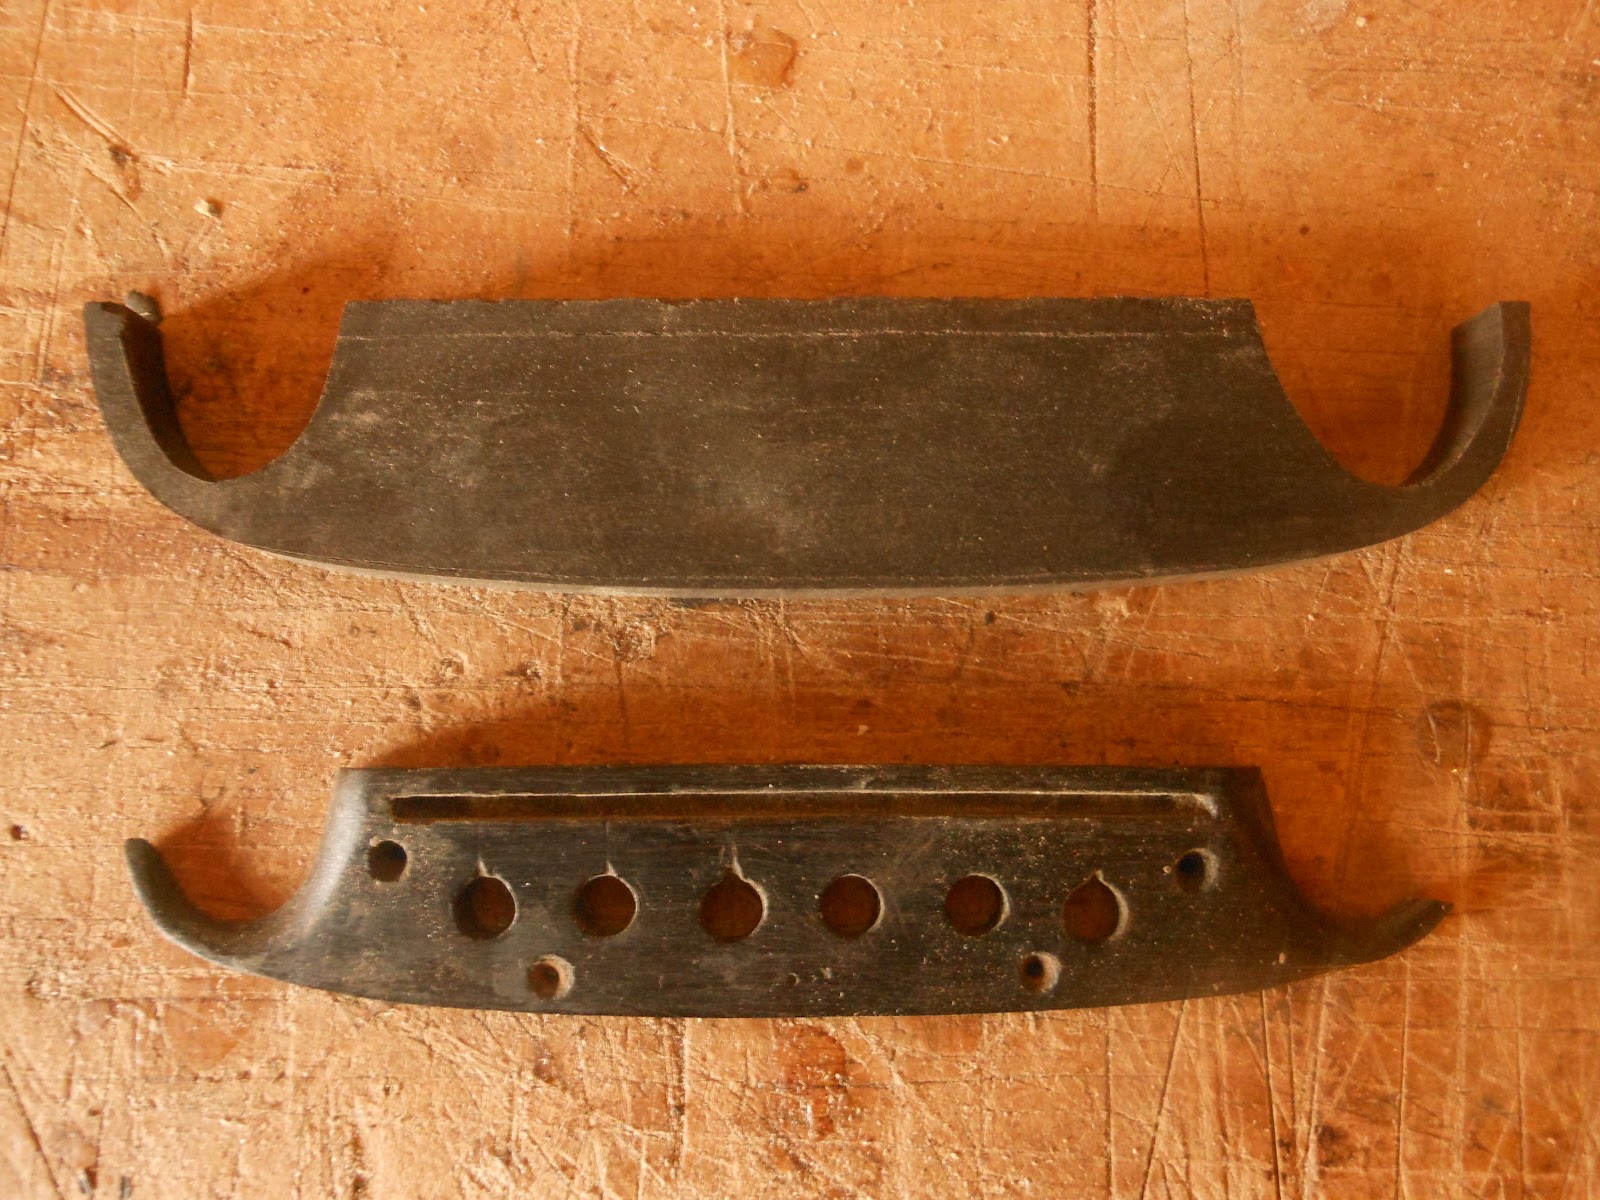
Making replica guitars presents a number of interesting challenges. It becomes clear when you first look at the original terz guitar that it was built quickly and economically. The quality of the timber is good and is all European; maple for the back and ribs, spruce front and the neck, fingerboard and bridge are stained or polished to look like ebony. The decoration in minimal, with simple purflings on the top but the back is completely unbound. Inside the original, the workmanship was confident and skilled but not refined, and tool marks were visible on the struts and the inside of the top. This was a functional working instrument that would have been produced quickly and cheaply. My guess is that the Ries workshop could assemble one of these instruments in a few days. I originally intended to make this guitar quickly but inevitably other commisions took priority. My only significant departure from the original was the use of a 2 piece, rather than a single piece, maple back. Also, as the original bridge was missing, I had to take specifications for the bridge for my instrument from other sources.


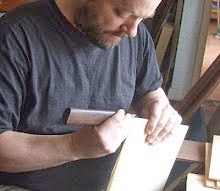
Not the best picture of me I'm afraid (this is as close as I get to smiling for the camera) but it does show the petite size of the guitar. This picture was taken on a bitingly cold morning; the instrument left the workshop a few hours later and I felt bereft. I must make another when I have time...


The original guitar is being carefully restored by 19th century guitar expert, James Westbrook and in the past week he has completed the work on it and strung it to tension. The restored original is shown below. I was keen to play this guitar and to see how it compared to my copy. As mentioned, the small size of this guitar and the shorter scale length contributes much to the sound, and I was struck between the similarities of my new copy, and the original.


Sunday 28 October 2012

Walnut


It is a shock to find that my last post here was in July in the middle of a rather wet and cold English summer. Much has happened in the workshop, guitars finished and started, new tools and equipment acquired, restoration work both completed and on going and an ever growing to do list.Much to my frustration I find myself without a camera at the moment, and my phone isn't quite up to the job of capturing first class images. I need to remedy this situation soon. so the picture at the top of this post is an oldish one, although it is the start of a new guitar and one that I hope to feature on this blog in the next month or so. The back in the picture is English walnut and when I bought this a few years ago I was absolutely captivated by its subtle beauty. Walnut is an overlooked timber for guitar back and sides and is not that easy to find ( the English variety anyway) but I would like to acquire alot more of this fantastic wood.

Monday 23 July 2012

Headstocks


I seem to have writen about older guitars for some time now, but in fact I am working hard on my own instruments as well. Building my own contemporary guitars provides a nice contrast to the careful restoration of historic instruments, and when my brain becomes too addled with one, I can seek solace in the other.

The past couple of weeks has also seen a couple of commissions being prepared for collection and delivery - it is strange to think they are now in far flung parts of the world.

I have been preparing necks and headstocks for future commissions- 6 in total. I have written before about preparing batches of parts and it is something I find very satisfying to do. Recently, a visitor to the workshop described this as 'mass production' but that is far from the case. I would be happy to prepare a few more necks, but it would hardly compete with the big guitar making factories, and certainly not those that are using CNC equipment to produce virtually finished items. For me, using the simple hand tools of the artisans workshop is an efficient and practical way to make a small batch, such as the necks in the pictures. The relevant tools and jigs are all to hand and the pillar drill (for drilling the machine head barrel holes) is set to correct drilling depths.

The picture below shows 4 of the necks just prior to drilling. Taken late in the evening at the end of the long hot day in the workshop, the colours really do not reflect the beauty of the woods used on the head facings.
From left to right; thuja burr, ziricote, prehistoric bog oak and African ebony. The 2 heads not in the picture are both African blackwood.


Friday 22 June 2012

Ries


The workshop has never been busier. I was saying to someone recently that it was almost too busy, although in fact I like it like that and it means I have to be really organised with scheduling my work. I do not always find this easy, as the creative process of making or restoring a guitar is one that cannot always be hurried and I am resolute in putting the quality of my work first.
I have 2 guitars in the early stages of construction, 1 awaiting frets and polish, 2 guitars being polished ( I am always polishing), 2 guitars that the wood is selected for, plus restoration work lined up into 2013.

For light relief I have been making a copy of a Terz guitar by the Viennese make Nikolaus Georg Ries. I am now polishing this guitar and will be stringing it up when I have time. As it is for my own amusement I can only work on it occasionally, but I have great fun with it as it is so different from my normal full size, modern classical guitars.

The picture above shows the simple barring on the front. The originals must have been made very quickly,; knocked out almost. The picture below shows the head and  neck with a sealer of clear polish and the big shiny buttons of golden shellac that I am using for the back and ribs of the guitar.

( For more on the story of this guitar click here and here).


Wednesday 13 June 2012


The restoration of the guitar by Francois Roudhloff is now complete and the instrument is strung up to pitch. (More details of the restoration can be found here and here). This has been a most gratifying process and I am very pleased with the final result. This is also one of the nicest sounding 19th century guitars I have played - always a bonus.

This guitar is now returned to how it was originally; the replacement fingerboard removed and an authentic bridge and peghead made. The wonderful finish on the back and ribs is completely original. This colour doesn't come out of a bottle, but takes almost 200 years to achieve.


After the major work had been completed there were a number of small tasks to finish; replacing a small piece of ebony veneer on the back of the neck, gluing up a couple of hairline cracks, fret fettling, peg fitting, and making a new nut. The new nut (above) is made of ebony and in the picture you can see the strings slots being marked out onto the nut blank.

The 2 pictures below show the old replacement head and the new head. It is nice to be reminded of how the instrument was and the improvements that have been made. It is very easy to be dismissive of previous repair work but, in fact, the headstock I replaced was a functional repair that perhaps guaranteed the survival of the instrument. A broken guitar may have been discarded but this guitar continued to be used and enjoyed.


The guitar still has, what is almost certainly, its original case (pictured below). Although not offering the protection a modern case would give, it adds greatly to the character of the guitar. The new replica bridge can be seen in the picture, as can the lighter patch left by the modern classical bridge that had been fitted at some point. I have left this patch to darken down naturally as, in the long term, I feel this will give a more satisfactory result.

That concludes this restoration, and I am looking forward to returning it to its owner. If you have read this blog and get the impression I enjoyed working on this guitar, you would be absolutely right!


Thursday 7 June 2012

The wood so wild - part 2


Earlier on in the English spring, I journeyed over to David Dyke's in East Sussex to pick up some fretwire, and to have some rosewood cut. A full account of this trip can be seen here. I acquired some striking sets of English yew and I have posted pictures of these two sets as I think they are really rather wonderful.
Yew is a magical timber and much folklore has been connected to it. It has been seen as a tree of significance for many thousands of years, and can still be seen in many old churchyards.
It can be quite problematic to find clean sections of timber suitable for guitars; it grows in a wild and distorted way and much of it is beset with knots and other defects. It is however a lovely timber to work, with a fine silky feel. These two sets are light and resonant and will make delightful guitars. I will let them season in my workshop a little while longer; I am so looking forward to using this wood.


The rosewood David cut for me is the last of a huge baulk of timber I purchased many years ago from a retired cabinet maker in Essex. He had spent much of his working life making gun cabinets for one of the big London shotgun makers (Holland and Holland I think). He had purchased this piece of  rosewood from them, and they had had it since the early 1900's. Dark and fragrant, this is a wonderful timber, but I will not be purchasing any more as it is endangered in its native Brazil. This ancient piece of timber yielded a number of beautiful 4 piece backs, one of which is pictured below.


Monday 4 June 2012

Roudhloff restoration (Part 2)


The restoration of the Roudhloff guitar has been continuing well, in spite of being out of the workshop for a couple of weeks. I was called up for jury service, a civic duty that is both interesting (when one is actually on a trial) and deadly dull (when hanging around in the jury room waiting for a case to begin).

It is certainly good to be back at my workbench and to be working on guitars new and old. The fine ebony pegs (above) are for the Roudhloff, and are appropriate reproductions for this guitar. These were made for me by skilled luthier, Bruce Brook. Now they have arrived I will be able to fit these to the peghead in readiness for stringing.


Having revealed the original flush fingerboard, it was decided to install bone frets. Remnants of the original  frets were found in the slots, so we knew that this was how the guitar was originally fretted. The original frets appeared to be of ivory, but bone is a much more acceptable alternative these days. All the new frets had to be cut by hand; the picture above shows them just about to be cut to length, and then fitted individually into the fingerboard.


I have also been making a new ebony bridge for the Roudhloff. The guitar, at some point, had a modern classical guitar bridge fitted, but I have now made an appropriate pin bridge, based on an original that came from another restoration commission. The picture above shows the new bridge in its rough cut state, and the original that was used as a pattern.

Here is the finished headstock, just about to be given its first coat of black French polish. I love this polish although I have very little use for it on my own guitars. It has a lovely inky, black quality to it and it is fun, but tricky, to use. Many 19th century guitars had necks finished using this ebonizing process. Here, I have masked the neck and am just about to brush on the first coat.


Thursday 17 May 2012

Henri Rudert-Restoration progress


Here are some details of of the Henri Rudert that I took in recently. It really is the most lavishly decorated guitar; the workmanship is some of the finest I have seen. Like many guitars, it has suffered damage over the years, most of it due to humidity changes. The main area of restoration on this instrument is focused on the back, which has split from end to end. (see here)


The back is constructed like many guitars from the 19th century; spruce veneered with a decorative hardwood, in this case flamed maple. This type of construction allowed for a more economical use of precious and beautiful woods but over time the tensions in the back have caused it to split. Not only has it split; it has also curled up on either side of the split, as can be seen in the picture above.
I removed the back without using heat or water as the old glue was pretty degraded and came apart quite easily. I was pleased not to be using water as the delicate banding around the edge of the ribs is very delicate. Once the back was off the one remaining attached bar was removed, as was the label. The label was in two halves as the back had split through the middle of it. The back was then completely separated and ready for careful rejoining.


The curl in the back was removed by gently heating, followed by prolonged clamping. The split had at some point in the past been filled by a crude mastic, or filler and this had to be painstakingly picked away by hand. Very often the most time consuming part of restoration work is correcting or reversing previous repair work and removing this hard filler was a slow job that I completed over a number of days. Once the old filler had been removed I had to decide how far to go in rejoining the back. Ideally I would get a perfect match but the distortion of the wood over time prevented this. Also, the split is not straight edged, but is tightly waved, following the flame of the maple.

The picture below shows the back bars after they have been reattached to the back. The waist bars awaits fitting and reglueing, The split in the spruce will be restored once the back has been fully stabilised by the addition of the last back bar. The clamps are holding the delicate ends of the back until these can be reinforced.


And finally, the picture below, shows the signature and date found pencilled on the inside of the guitar when the back was removed. I am used to seeing these and other marks in old guitars, but I was very pleased to fine this one, especially as it gave a precise date. It also captured a brief moment in time, when a guitar maker, busy in his workshop, signed and dated his work, just as I do now.


Friday 4 May 2012

A recently finished guitar


This 2012 spruce and rosewood guitar left the workshop yesterday. I frequently get asked if I mind letting them go, and the simple answer is no. As a professional maker, I need to sell my work to continue what I am doing, and so finishing a guitar, receiving payment and dispatching it to its new owner is a natural and regular part of what I do. I also find that I constantly think of the next instrument I am to make; by the time a guitar is polished and strung, my involvement is over and it is time for the player to nurture the guitar and realise its potential. My mind is on future instruments; how I can build upon successes and carry my ideas forward.

This guitar was one I was particularly pleased with, and I spent a quiet hour with it yesterday looking, playing and measuring it, trying to absorb everything about it and what I should strive to replicate in future guitars.


Friday 27 April 2012

French guitar restoration part 1


This guitar came in a few weeks ago and has given me considerable pleasure to work on. It was clear, as soon as the case was opened, that the guitar had been considerably altered as is so often the case with vintage guitars. At some point the headstock had been broken off, and had been replaced by a rather inappropriate substitute, complete with unusually mounted modern tuners. The bridge had pulled away and had been replaced by a modern classical guitar bridge which, in turn, had failed. A new fingerboard had also been fitted but, just visible on the soundboard, were the ebony fret inserts that showed this guitar originally had a flush fingerboard. (See the photograph below.)


At some point in the past, I was told, the guitar had been taken out to Libya (there is an evocative luggage label from Tripoli on the case) and the hot, dry desert air had caused the guitar to dry out, resulting in some large splits in the top and back.

It was decided that I should take the restoration as far as I deemed appropriate, but that it should certainly be restored to a playing condition. This guitar has had many different incarnations and has been repaired and adapted according to circumstances. At this stage, I feel that the most appropriate course of action is to restore it, as near as possible, to its original state.


My first task was to try and close the top and back splits by re-hydrating the guitar. In theory, subjecting a guitar to a moist environment should swell the timber and close the cracks. However, sometimes other distortions and tensions prevent this from happening. As I write this, the splits have lessened but not closed completely.


It was only after the guitar had been in the workshop a few days that a close inspection of the interior revealed a very indistinct makers stamp, located on the upper treble side lining at the waist. Although unclear, the stamp is that of F. Roudhloff, a well known French maker from Mirecourt. Francois was the brother of Charles Roudhloff (and not the son, as sometimes believed) and uncle of Dominic and Arnould Roudhloff, who also made guitars.

I removed the old headstock and made a new figure of 8 head, based on that of the C.Roudhloff instrument. The pictures below show part of that process. A v-joint takes either 5 minutes or 5 hours to fit; this one took me 5 hours!


As can be seen from the picture below, the neck is veneered with fine, black ebony on a core of sycamore or possibly lime. The new head is sycamore and will be ebonised at the end of the restoration.


By some considerable coincidence, this week has seen a guitar by Charles Roudhloff in the workshop, so the temptation to photograph the two brothers' guitars together proved to much. The Charles Roudhloff, on the right, is a more ornate guitar with a moustachioed bridge and decorative binding.


Thursday 19 April 2012

Guitars in.....and out


The past couple of weeks have been extremely busy but highly enjoyable.
Firstly, a couple of fine 19th century guitars have been brought in, the most spectacular of which is a Henri Rudert which boasts some very flamboyant decoration. By modern standards this may seem somewhat florid and ornate, but I cannot help admiring the skilful execution of the work. The main work to be undertaken on this guitar is to repair the dramatic back split that runs from end to end of the body. The headstock (shown below) requires a little work, as does the soundboard.


I have also taken in a French guitar which is in need of substantial work to restore it to original condition. It can be seen in the picture below, furthest from the camera.

Those are the guitars that have come in, but I also have three new guitars leaving the workshop in the next week or so. I haven't had time to feature them on the blog, but they are guitars I am very pleased with and I hope their new owners are too. One of these guitars is seen on the workbench for final adjustments and polishing. Hiscox cases arrived earlier on in the week so these guitars are nearly ready to go.


Thursday 5 April 2012

The wood so wild - an Eastertide trip to David Dyke


I have mentioned David Dyke on this blog before, and I am sure that no UK instrument maker will be unfamiliar with his name. David has been one of the most prominent and respected instrument making suppliers for many years. David started by teaching guitar making in the 1970's before moving into timber supply, and since then his luthier supply business, based in Horam, East Sussex, has become established in many guitar makers address book. I remember visiting David for the first time in 1984 when I was in my first year at the London College of Furniture. I bought a set of Indian rosewood, some Brazilian mahogany and a set of flamed maple, and was enthralled by the sight of all the timbers, strips of inlay, racks of machine heads and coils of fretwire.


This week was the first week of the Easter holidays and so I combined a trip to David's with a family picnic as the children were not at school. I had a few bits and pieces to pick up, most notably some 1.6 fretwire for my Ries copy, but David was also cutting some rosewood blocks for me and I wanted to see it done. David uses a large circular saw for this job and, although it turns more of the wood to dust compared to a bandsaw, it leaves the timber with a very fine finish.


Business at David Dyke's isn't a slick, high-tech affair, but enjoyably laid-back. As I walked in Mike Reid was busy cajoling everyone into signing up to a children's charity competition (hopefully I will win a cuddly toy panda) and David himself was out the back having a brew in one of his sheds. Discussing instrument making with Mike is always fun; Mike has his own business, Small Wonder Music, specialising in inlay products.


Eventually David powered up his saw and sliced into the blocks of rosewood I had. These were the last remnants of a huge piece that I acquired many years ago. These last blocks were only good for 4 piece backs- jet black with a few pink streaks - and a few fingerboards which I swapped for a couple of sets of English yew. The size of the saw can be seen in the picture above, and the large stack of timber in the foreground is some African ebony that David had just sawn for backs and ribs.


The yard is not the most ordered in the world, but is all the more interesting for that, and David seems to know were everything is. Some new racks were being built when I visited this time, just visible at the end of the shed. I was taken with this violin template below, hanging on the peeled-paint door of the shed.


This area of East Sussex is one of narrow lanes, hedgerows and quiet woods. The beautiful river Cuckmere winds its way gently to meet the sea at the majestic Cuckmere Haven, and the dark line of the South Downs can often be seen.

We stopped for our picnic at Arlington and watched the first swallows of spring dipping over the water. The wild oak took my eye, its bare branches in contrast to the green exuberance of the hazel and hawthorn behind.


Saturday 10 March 2012

A week in the workshop (Friday)


Julio came today to pick up his new guitar. I had been delayed with this as the polish wasn't quite to my satisfaction and Julio had been very patient. Most guitar makers fret and worry about their finish; it is one of those things that can haunt you. In the case of this guitar, I kept getting a couple of thin patches on one rib, possibly exacerbated by a particularly oily patch in the rosewood. Anyway, eventually it was complete and polished.

Julio successfully dodged the traffic on the M25 and seemed very pleased with the guitar. I had provided 3 saddles with this instrument, offering different action options and Julio seemed very much at home from the start. I wish them both many happy years together!

Friday 9 March 2012

A week in the workshop (Thursday)


I had been planning on driving over to David Dyke's today to get some sawing done (some blocks of rosewood that I have been meaning to have cut for some time) but reluctantly I opted to stay in the workshop and finish off a few loose ends. Julio is due to pick up his guitar on Friday and I am keen to do some final adjustments and to complete the paperwork for the instrument.

Yesterday the tuners for this guitar developed a fault and I spent a few frantic hours procuring a new set (thank you Michael and David) and this put me behind with other work. I had been particularly keen to strip the top of the Ken Roberts guitar that came in a few weeks ago. The repair on the split in the soundboard has been completely successful and I now want to complete the re-polish so I can return it to its owner. The picture above shows the old French polish being softened and removed.

I have also been preparing some rosette blocks. This is a fun part of guitar making and the whole process seems quite miraculous. The strips below have not been glued but are held together with a peg to check the alignment. I'm glad I did this- looking closely at the photograph I realised I had left a strip out of the pattern.